icon
article-hero

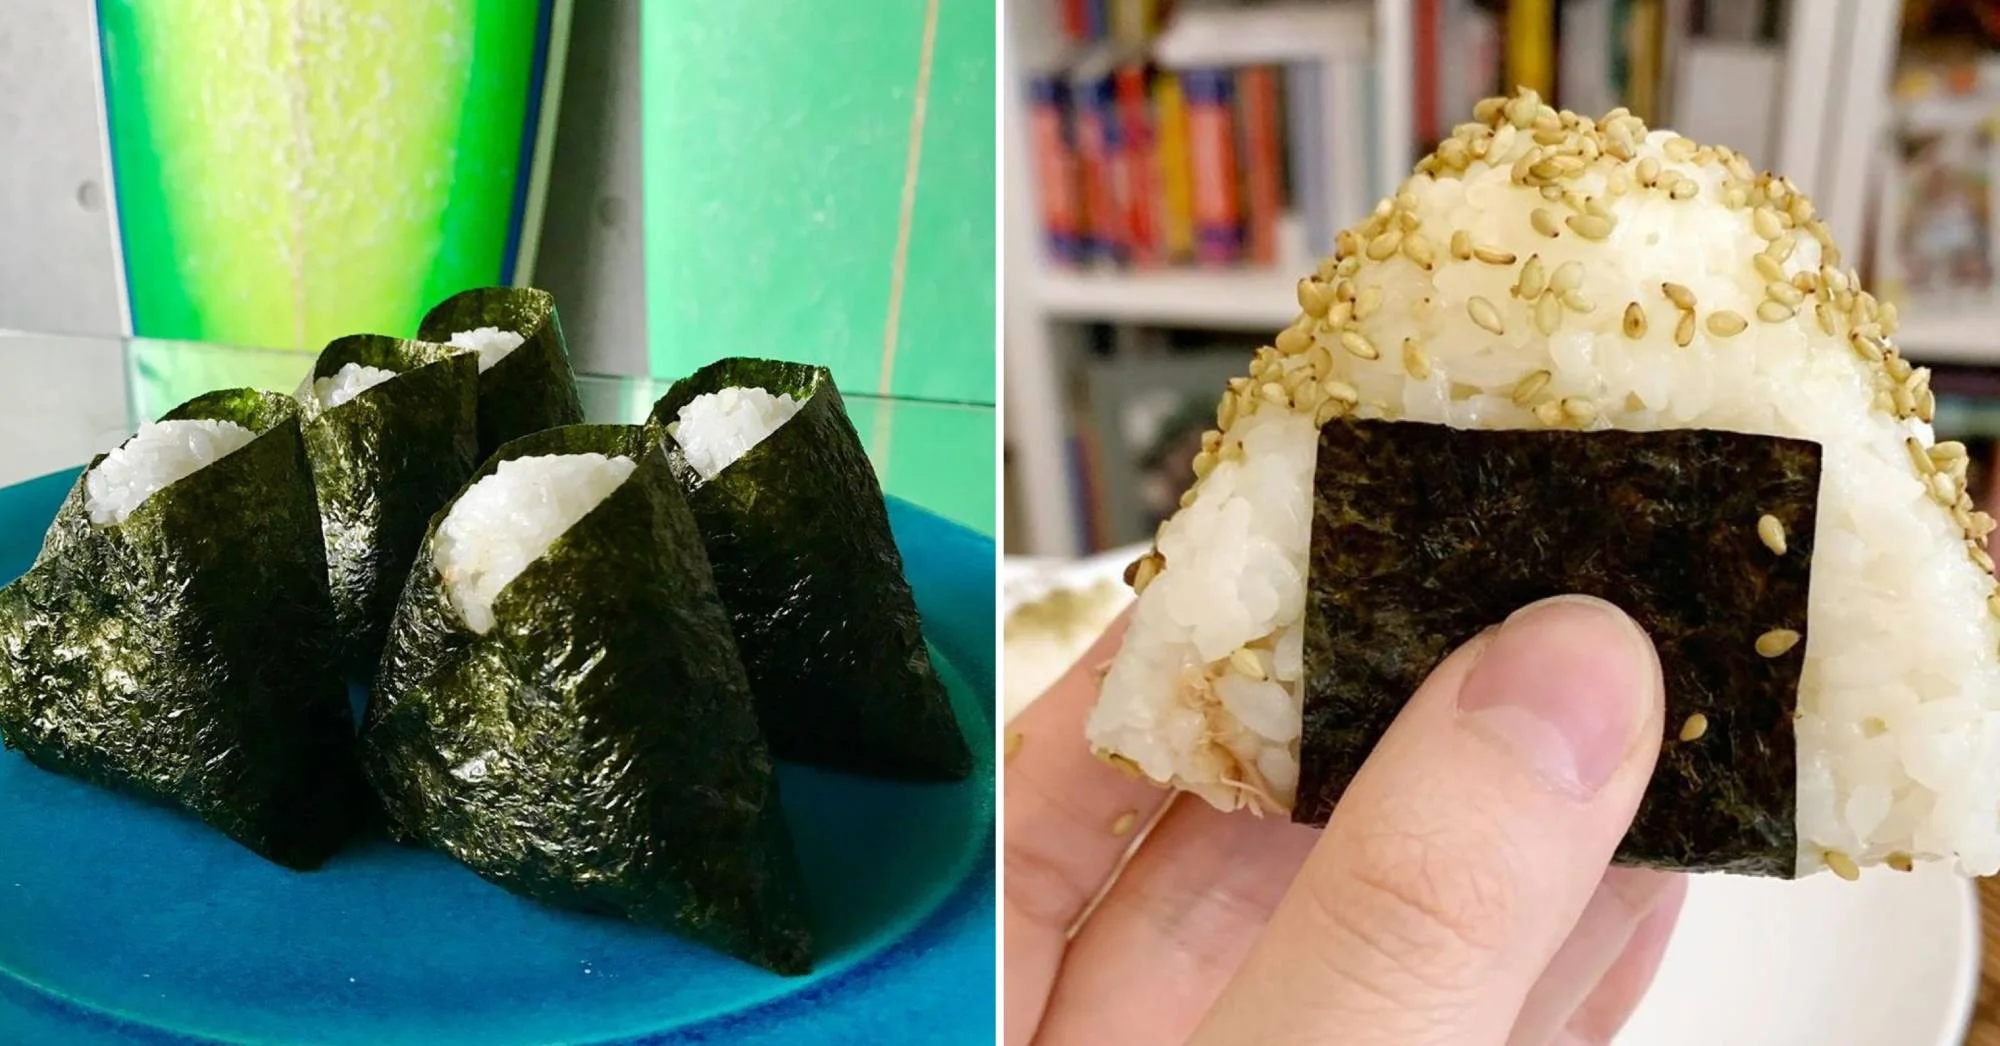
Easy Halal Onigiri Recipe: The Iconic Japanese Snack For When You're On The Go

avatar-name

Atiqah Mokhtar •  Jun 16, 2020

Onigiri (or Japanese rice balls) is Japan's ultimate quick and easy snack. Often sold at convenience stores (i.e. konbini) or made at home, it's perfect for breakfast, a quick snack between meals, or to add some bulk to your lunch or dinner. It's also very simple to make at home! Unlike sushi which requires flavouring the rice, preparing complex fillings and rolling them up, onigiri is easy to shape even just by hand. The ingredients are super easy to find in supermarkets nowadays too! So if you've every wondered how to make onigiri, it's time to make your own at home with our easy and halal onigiri recipe, with fillings including tuna mayo, ebi mayo and teriyaki salmon or chicken!

Our recipe makes the iconic triangular onigiri fully wrapped in nori (seaweed), but you can actually make onigiri in all kinds of shapes, including simple round balls, cylinders or any other shape you'd like! In addition, to keep it simple we'll be shaping the onigiri by hand, but you could also always get onigiri moulds that are easily available at Japanese stores like Daiso. We also include three different kinds of filling that are super popular, but feel free to get creative and use whatever fillings you like!

Ingredients (makes 6 - 8 onigiri, depending on size)

  • 1 cup Japanese short-grain rice
  • 2 sheets of nori (seaweed)
  • Salt

For fillings:

  • ½ small can of tuna
  • Japanese mayonnaise (i.e. Kewpie)
  • 1 fillet salmon (you can also substitute this for 1 boneless chicken fillet)
  • Teriyaki sauce (you can find halal-certified teriyaki marinades in supermarkets or on e-tailers, such as the Kewpie or Hinode. Alternatively, just use your own favourite marinade!).
  • Handul of cooked shrimp, cut into small pieces (you can find ready-cooked frozen shrimp in supermarkets, or buy raw fresh or frozen shrimp and cook it yourself).

Directions

  1. Cook the rice in a rice cooker according to the instructions on the pack.
  2. In the meantime, get your fillings ready (keep the prepared fillings in the fridge while waiting for your rice):
    • For the tuna mayo, add the drained tuna into a bowl, then add about half a tablespoon of the mayonnaise. Add salt and pepper to taste. Mix well.
    • For the teriyaki salmon, simply marinade your salmon fillet (or chicken) in the sauce and grill in the oven or on a hot pan until cooked through. Shred the salmon or dice your cooked chicken into small pieces.
    • For the shrimp mayo (ebi mayo), add the cooked pieces of shrimp into a bowl, add mayonnaise, salt and pepper to your preference and mix well.

  3. Once your rice is cooked, transfer it to a large dish or plate to help it cool down. Fluff the rice with your rice scooper and let it cool slightly - you want the rice to still be warm when you make your onigiri.
  4. Cut your nori sheets into thirds (i.e. 3 strips per sheet, so you'll have 6 sheets altogether). Prepare a bowl of water and a small dish of salt.
  5. Wet your hands in the bowl of water, then take some of the salt and rub it over your hands. Scoop out some rice (about a third of cup) into one hand. Make an indentation in the centre of the rice, then place about two teaspoons of filling.
  6. Wrap the rice around the filling so it's covered. Gently mold the shape of the rice into a triangle between your palms, using your fingers to help guide the shape. Do not forcefully press the rice or squeeze it too tight, you just want to apply enough firm pressure to shape it.
  7. Take a strip of nori and lay your onigiri flat at the centre. Wrap the nori sheet around. Repeat with the remaining rice and fillings. Remember to wet and salt your hands before starting on a new onigiri!
  8. It's best to serve the onigiri immediately after making. If you're storing it, it's best to keep the nori sheets separate and wrap the onigiri with cling wrap to avoid it drying out.

Notes:

  1. Instead of wrapping the nori all around the onigiri, you can also cut shorter strips and simply place it on the bottom of the onigiri (per the picture above).
  2. If you don't want to confuse which onigiri has what fillings, you can place a small amount of the filling at the top of the triangle to indicate what filling it contains.
  3. Wetting your hands helps to prevent the rice from sticking while you shape it. Salting your hands adds flavour to the rice and is said to make your onigiri last longer.

Making onigiri is definitely less daunting than making sushi, and it's fun to do it yourself because you can get creative with the fillings and also make it into whatever shape you like! So pick up some Japanese rice and nori sheets the next time you're at the supermarket and make these yummy treats. And don't forget to make some tamago sando and fruit sando to round out your konbini food feast!